
I was on the planning committee for the book fair at Zoe's school. The theme was "Story Laboratory" so everything revolved around a science theme. I'm sure you are thinking, "Book fair? That's not a big deal!" At Zoe's school it is! They hold a huge kick-off pep rally lead by the sixth grade book fair crew. Then they have the fair set up for a week with events for every member of your family to come. We had breakfasts for the moms and grandparents. We had a movie night geared at dads. We had a Poetry Cafe where hot chocolate was served by one of the local coffee shops. (Thanks to JoZoara Coffee Shop!) Our grand finale was Super Science Saturday where we had 9 different science sessions- from robotics to building roller coasters to mammals. It was a ton of fun.
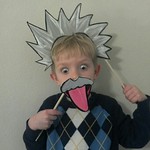
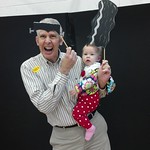
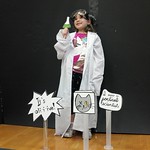
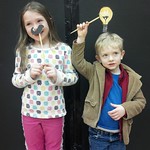
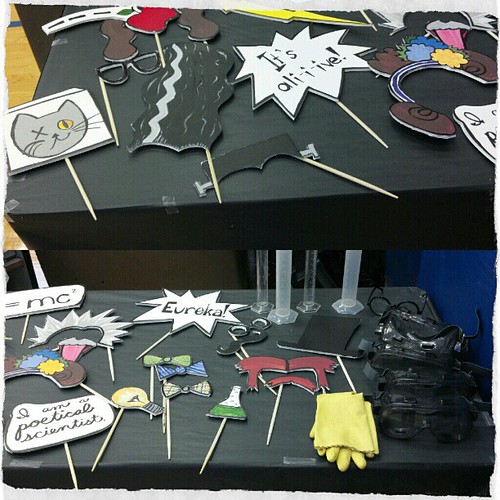
My big contribution was setting up a photo booth with photo props. The background was just a couple of huge pieces of cardboard painted black. I wanted to keep that simple so the props would show up well. Since we were going with a science theme, I made most of my props based on famous scientists such as Newton, Tesla, and, of course, Einstein. I also wanted to make sure female scientists were represented. Marie Curie, arguably the most famous female scientist, did not have interesting enough hair for me to use. Instead I decided to do Ada Lovelace hair. Not only does she have interesting hair, she also has an interesting life! (30 second recap: Daughter of Lord Byron, computer programmer for Babbage's Analytical Engine, called herself a "Poetical Scientist")
Want to know how to make photo props?
It is easy but time-consuming.
Supplies:
Foam Core boards (Look for it with the regular poster board.)
Exacto Knife
Cutting board
Either a Sharpie Marker and paints
OR printed out pictures and glue
Chop sticks or dowel rods
Glue (Tacky glue worked well.)
- Draw the outlines of the props onto the foam core.
- Cut them out using your Exacto knife. Don't cut off your fingers!
- Paint prop OR glue print-out onto prop
- Touch up the outline using your Sharpie after the paint or glue has dried.
- Glue the chop sticks on the back. Make sure to consider which hand you want them held. I put the sticks for the hair/hats to be held in one hand while the smaller props were made to be held in the opposite hand. The word signs had sticks in the middle so they could be held in either hand.
As you can see from the photos, we also added other props like lab coats, gloves, goggles, and graduated cylinders. The kids really enjoyed the variety.

No comments:
Post a Comment